Import Canon XF400/XF405 4K Video to Premiere Pro CC
Category : 4K Formats
Canon has just announced 2 new 4K 50p camcorders – Canon XF400 & XF405, which enables you to record up to 3840×2160 resolution video in MP4 file format with MEPG-4 AVC/H.264 compression codec. After copying the 4K video clips from the SD card onto a local hard drive to edit with the latest version of Adobe Premiere Pro, you may find the video keeps skip and jump and finally making the editing impossible. How to get a smooth and high quality workflow of Canon XF400/XF405 4K with Premiere Pro CC, just read on…
Why XF400/XF405 4K video skips in PPC?
Although Premiere Pro CC is confirmed to have perfect capability to handle 4K resolution video editing. However, sometimes, if you try to work 4K video with Premiere Pro CC on a slow computer that doesn’t meet the minimum requirements to edit 4K video, the condition would be worse. The main reason is the 4K video editing is much more taxing on the computer CPU, especially when employing various effects and color correction.
The good news is that the latest Premiere Pro CC now has built-in features that provides an incredibly powerful proxy workflow that makes editing of 4K media a breeze on even the most anemic of systems.
For detailed information, please visit: Edit 4K with PPC on slow computer
Best editing workflow of Canon XF400/XF405 4K with PPC
After you’ve fix the 4K video skipping issue on Premiere Pro CC, then the next important issue is how to get a smooth workflow of 4K video with PPC. Although PPC has native importing support for the 4K H.264 MP4 video shot with Canon XF400/XF405, however, the distribution-oriented formats H.264 is not a good ideal editing format due to the following reasons:
– H.264 is mathematically intense. It takes some serious computer horsepower to decode its compression.
– Because it is so mathematically challenging, it takes longer to render H.264 files than other formats.
– H.264, as shot by HDSLR cameras, is an 8-bit format, which means that you are potentially compromising your effects and, especially, color correction and compositing with gradients.
– H.264 does not integrate easily with other video formats.
Related article: Edit Canon XF400/XF405 with FCP X
To eliminate all the editing issues listed above, we highly recommend you to encode H.264 to Apple Prores codec, which has perfect compatibility with Premiere Pro CC, compare with H.264 codec, it has the following great benefits:
– It is less intensive, You don’t need a fancy graphics card and you don’t need as fast a computer to edit these transcoded formats.
– Fast encoding and decoding: Delivers high-quality, real-time playback and faster rendering times.
– As a 10 bit codec, Apple Prores can process a lot of more color data and make the color correction process easier.
– Provides an effective workflow for projects involving multiple acquisition formats when you want to standardize on a single codec.
Encode Canon XF400/XF405 4K to Apple Prores codec
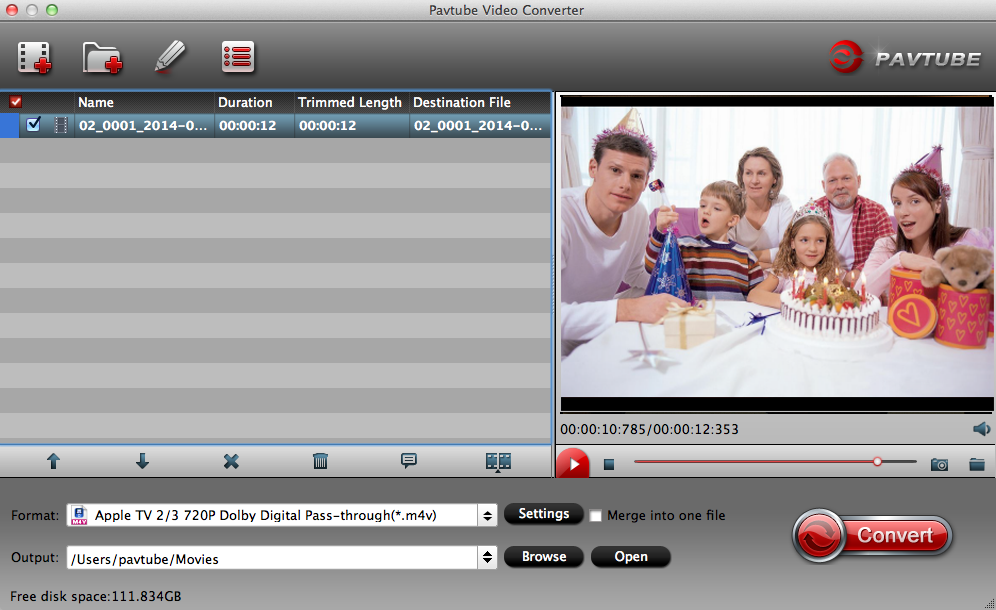
Here, you can download our best Prores Converter – Pavtube Video Converter for Mac to transcode Canon XF400/XF405 to Premiere Pro CC most preferable Apple Prores codec. The program supports batch conversion mode, so that you can load multiple video into the application at one time for conversion to save your precious time.
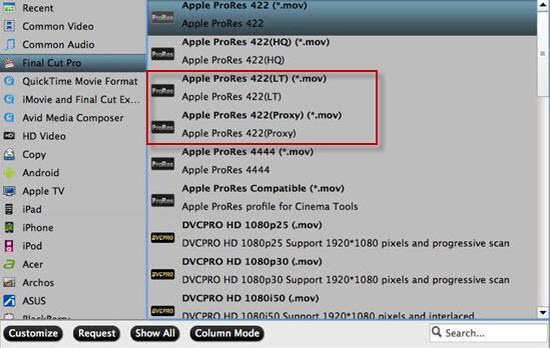
The application can assist you to efficiently to directly output Apple Prores codec in various different file types including “Apple Prores 422(*.mov)”, “Apple Prores 422(HQ)(*.mov)”, “Apple Prores Proxy)(*.mov)” and “Apple Prores (LT)(*.mov)”.
If your computer is old or slow, or you just want to do some rough editing, you can select to output “Apple Prores Proxy)(*.mov)”or “Apple Prores (LT)(*.mov)”format to save more space and bandwidth. However, if your computer are powerful enough to handle multicam and high-resolution video and you are going to do many effects editing work with Premiere Pro CC, it would be much ideal to choose “Apple Prores 422(*.mov)”or “Apple Prores 422(HQ)(*.mov)” for better performance.
Pavtube Video Converter for Mac is available on macOS High Sierra, macOS Sierra, Mac OS X El Capitan, Mac OS X Yosemite and Mac OS X Mavericks, etc. In addition, it is also accompanied by an up-to-date Windows version – Pavtube Video Converter to perform the conversion on Windows 10/8.1/8/7.
Pavtube Video Converter for Mac has perfect compatibility with the new Mac OS, therefore, feel free to install and download the application even if you’ve upgraded to the newest macOS High Sierra.
Step by Step to Import and Edit Canon XF400/XF405 4K with Premiere Pro CC
Step 1: Import Canon XF400/XF405 4K videos.
From “File” drop-down option, select “add Video/Audio”to add Canon XF400/XF405 4K H.264 MP4 video files into the program.

Step 2: Choose output file format.
From “Format” bar drop-down list, choose Premiere Pro CC best favorable Apple Prores editing codec.
If you try to do more effects editing of the Canon XF400/XF405 4K video with Premiere Pro CC on powerful computer, it would be much ideal for you to choose “Apple Prores 422(*.mov)” or “”Apple Prores 422(HQ)(*.mov)”for high quality performance.

If you have a underpowered Mac computer, to get a smooth post editing workflow, it would be much ideal for you to choose”Apple Prores 422(Proxy)(*.mov)” or “Apple Prores 422(LT)(*.mov)” format.

Tips: Click “Settings” on the main interface to open “Profile Settings” window, here, you can flexibly adjust the output profile parameters including video codec, resolution, bit rate, frame rate, audio codec, bit rate, sample rate, channels, etc as you like to get better output video and audio quality.
Step 3: Start the conversion process.
After all setting is over, go back to the main interface and hit right-bottom “Convert” button to start to convert Canon XF400/XF405 4K H.264 to Premiere Pro CC most compatible Apple Prores editing formats encoding process.
When the conversion is completed, launch Final Cut Pro X on your Mac computer to import converted video to Premiere Pro CC for smooth post editing workflow.


