Import DJI Zenmuse X7 4K Video to Premiere Pro CC
Category : 4K Formats , Adobe Premiere
DJI has just Revealed Zenmuse X7, the World’s First Super 35 Digital Film Camera Optimized for Professional Aerial Cinematography. With the camera, you can shoot DCI 4K at 30 fps, UHD 4K at 60 fps in Cinema-DNG format and also DCI and UHD 4K in ProRes and H.265/H.264. When the shooting is completed, if you are looking for professional video editing software for DJI Zenmuse X7 4K video editing, Adobe Premiere Pro CC can be your best choice. But how about the workflow of DJI Zenmuse X7 4K video with Premiere Pro CC?
Can Premiere Pro CC handle all DJI Zenmuse X7 4K video?
From Premiere Pro CC supported file formats, we can see that it can direct import the 4K H.264/H.265/ also the raw 4K Prores and Cinema-DNG video shot with DJI Zenmuse X7 4K video. However, you may find that it will take a long time to decode the 4K H.264/H.265 codec and also very CPU intensive especially when the decoding process takes on a not powerful computer. What’s more, the 4K H.264/H.265 video doesn’t integrate easily with other video formats. If the H.264 or H.265 video are in 8-bit format, you are potentially compromising your effects and, especially, color correction and compositing with gradients.
Best workflow of DJI Zenmuse X7 4K video with Premiere Pro CC
To fix all the above listed head-scratching issue, it would be much ideal for you to standardize all the DJI Zenmuse 4K video on a single codec – Apple Prores. The reason why we choose this editing codec can be listed below:
– Perfect compatibility with Premeire Pro CC
– Designed for great software flexibility and performance. No extra hardware is required for encoding or decoding.
– Support all of the current frame size such as SD, HD, 2K, 4K and 5K
– As a 10-bit codec, Apple Prores can process a lot of more color data and make the color correction process easier
Related article: Work Zenmuse X7 4K with FCP X
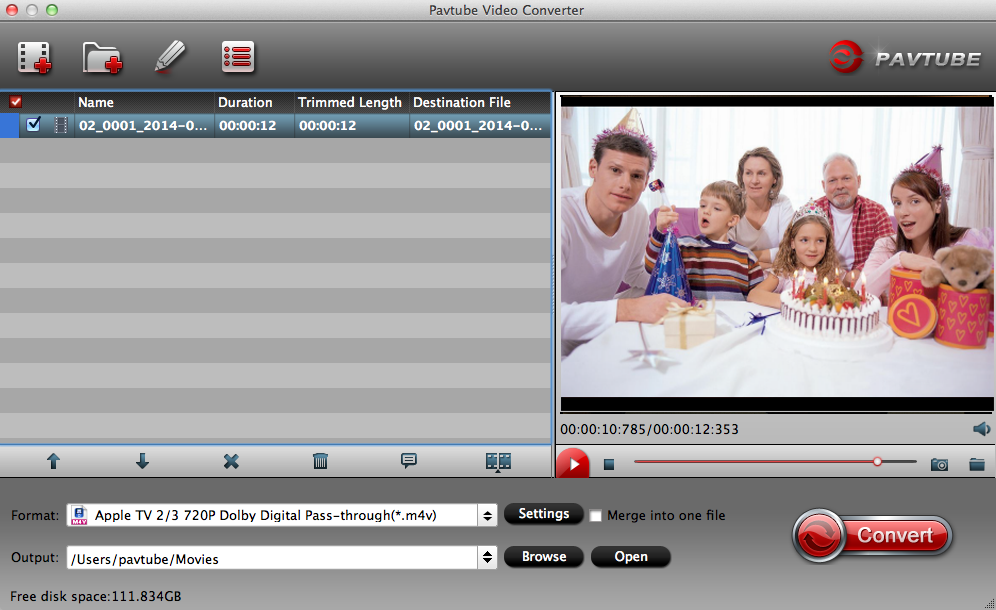
Here, you can comprehensively encode DJI Zenmuse X7 4K to Premiere Pro CC high quality and high performance editing codec Apple Prores with our best Prores Converter – Pavtube Video Converter for Mac. The program has full importing support for all the 4K video including H.264/H.265/Prores/Cinema-DNG format shot with DJI Zenmuse X7 camera. Thanks to its batch conversion mode, you can load multiple 4K video into the application at one time for conversion.
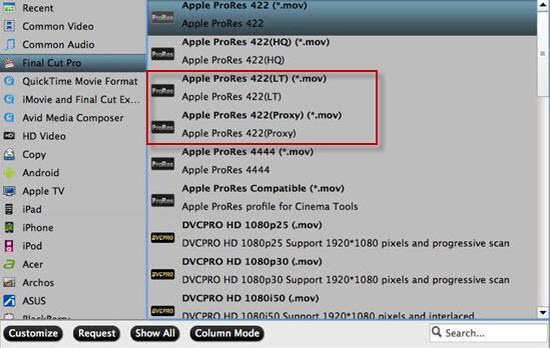
To satisfy your different editing needs, the application does you a great favor to encodie DJI Zenmuse X7 4K to Apple Prores in various different types including “Apple Prores 422(*.mov)”, “Apple Prores 422(HQ)(*.mov)”, “Apple Prores Proxy)(*.mov)” and “Apple Prores (LT)(*.mov)”
If you computer is old or slow, or you just want to do some rough editing, you can select to output “Apple Prores Proxy)(*.mov)”or “Apple Prores (LT)(*.mov)”format to save more space and bandwidth. However, if your computer are powerful enough to handle multicam and high-resolution video and you are going to do many effects editing work with FCP X, you’d better choose to output “Apple Prores 422(*.mov)”or “Apple Prores 422(HQ)(*.mov)”for better performance.
Edit DJI Zenmuse X7 4K video
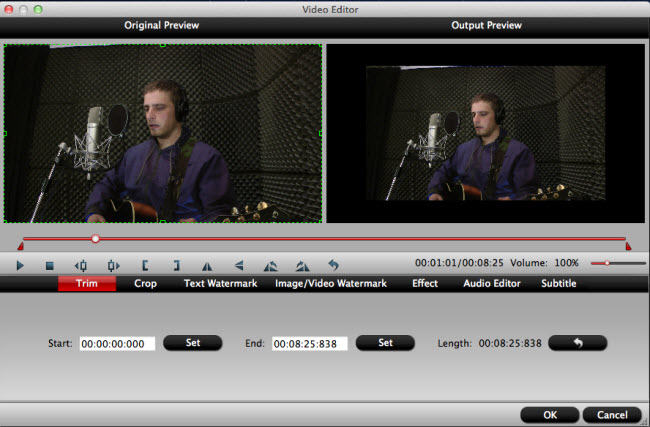
You can complete some simple video editing work with the built-in versatile editing tools offered by our application before start the professional post editing workflow of DJI Zenmuse X7 4K video with Premiere Pro CC. You can use the trimming tool to cut away unwanted parts from the beginning or end, use the cropping tool to remove the black edges. You can also add transparent text watermark to video, apply special rendering effect or insert external SRT/ASS/SSA subtitle to video.
How to Encode DJI Zenmuse X7 4K to Apple Prores for Premiere Pro CC Editing?
Step 1: Import DJI Zenmuse X7 4K videos.
From “File” drop-down option, select “add Video/Audio”to add DJI Zenmuse X7 4K Prores/H.264/H.265/Cinema-DNG 4K files into the program.

Step 2: Choose output file format.
From “Format” bar drop-down list, choose Premiere Pro CC best favorable Apple Prores editing codec.
If you try to do more effects editing of the DJI Zenmuse X7 4K video with Premiere Pro CC on powerful computer, it would be much ideal for you to choose “Apple Prores 422(*.mov)” or “”Apple Prores 422(HQ)(*.mov)”for high quality performance.

If you have a underpowered Mac computer, to get a smooth post editing workflow, it would be much ideal for you to choose”Apple Prores 422(Proxy)(*.mov)” or “Apple Prores 422(LT)(*.mov)” format.

Tips: Click “Settings” on the main interface to open “Profile Settings” window, here, you can flexibly adjust the output profile parameters including video codec, resolution, bit rate, frame rate, audio codec, bit rate, sample rate, channels, etc as you like to get better output video and audio quality.
Step 3: Edit DJI Zenmuse X7 4K videos.
By default the Edit icon is grayed out. To activate the Edit menu, you have to select an item first. When a video or movie is selected, click the pencil like Edit icon on the left top tool bar to open the video editor window, here, you can play and preview the original video and output effects. Also you can flip or rotate video, trim, crop, add watermark, apply special effect, edit audio or insert external subtitle.

Step 4: Start the conversion process.
After all setting is over, go back to the main interface and hit right-bottom “Convert” button to start to convert DJI Zenmuse X7 4K to Premiere Pro CC most compatible Apple Prores editing formats encoding process.
When the conversion is completed, launch Final Cut Pro X on your Mac computer to import converted video to Premiere Pro CC for smooth post editing workflow.


