Downscaling 4K UHD to 1080P HD on Mac with Highest Quality
Category : 4K Compressor
4K is a new resolution standard designed for digital cinema and computer graphics. It is four times of the resolution of 2K projector and 1080p HDTV. At 4K resolution, every single details and Close-ups on the image can be seen. However, it is also costly to access 4K Ultra HD, for the data amount of each frame is as big as 50MB. That is to say, the facilities of top configuration are required for decoding, playing, editing and uploading a 4K Ultra HD video. With the number of 4K-capable cinemas growing fast, more and more new movies are filmed directly in the 4K digital format, it is a nice choice to 4K to 1080P resolution to solve the issue in achieving 4K on media devices, players, editing progreams. Here we can introduce an easy to use 4K Video Converter for Mac and show you the detailed guide on how to convert 4K to 1080P resolution on Mac without losing a lot of quality.

There are numbered tools and utilities to convert and compress the lumpish ultra HD videos. Just like the way it is dealing with 1080p HD videos, Pavtube Video Converter for Mac is a powerful UHD 4K Converter which is capable of converting any UHD 4K video to 1080P or other SD formats. Besides changing resolution from 4k to 1080P, you can also use it to upsacle 1080p to 4K K easily. Besides, you can also transcode between all video and audio formats and set any resolution value you like.
Unlike some free video converters, it provides hundreds of output format presets for 4K videos, such as Apple ProRes for Final Cut Pro, AIC MOV for FCE (Final Cut Express) and iMovie, MPEG-2 for Adobe Premiere Pro, MP4 for any mobile or PC video players, and more formats for better editing, playing, and burning. For Windows users, turn to 4K Ultra HD video converter.
Free Download Best 4K Reducer:
Other Download:
– Pavtube old official address: http://www.pavtube.com/video-converter-mac/
– Cnet Download: http://download.cnet.com/Pavtube-Video-Converter/3000-2194_4-76179460.html
– Top4download.com: http://www.top4download.com/pavtube-video-converter-for-mac/iujpttsg.html
Quick tutorial on how to downscale 4K UHD to 1080P HD on Mac OS Sierra
Step 1. Load source 4K videos
Install and launch the best 4K to 1080p converter on your Mac, then drag and drop your 4K footage to it. You can also click “Add video” button to load your 4K UHD videos. Batch conversion is supported so that you can add multiple files to convert a time.

Step 2. Select output format
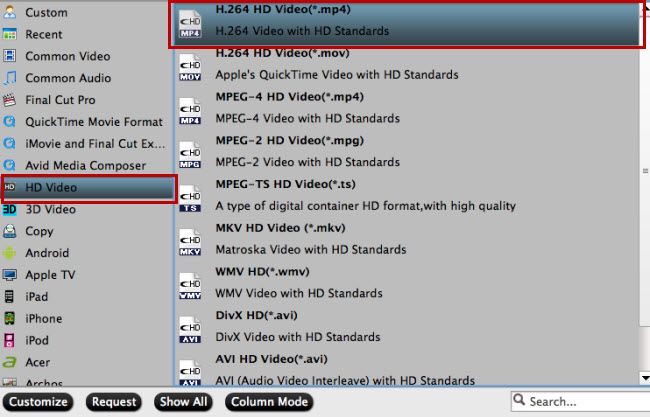
Now select a proper format as the output format from the drop-down-list of “Format”. There are MP4, MOV, AVI, WMV, etc. available for your choice. If you want to convert 4K footage to editing in Final Cut Pro, Premiere Pro, Avid or iMovie, there are professional encoders like ProRes, MPEG-2, DNxHD, Apple Intermediate Codec, etc. in “FCP”, “iMovie and Final Cut Express” , “Avid Media Composer”, “Adobe Premiere/Sony Veags” category. as example. After selecting the output format, you can choose an output path as the destination folder to save the converted 1080p movie.

Step 3. Set 1080p resolution
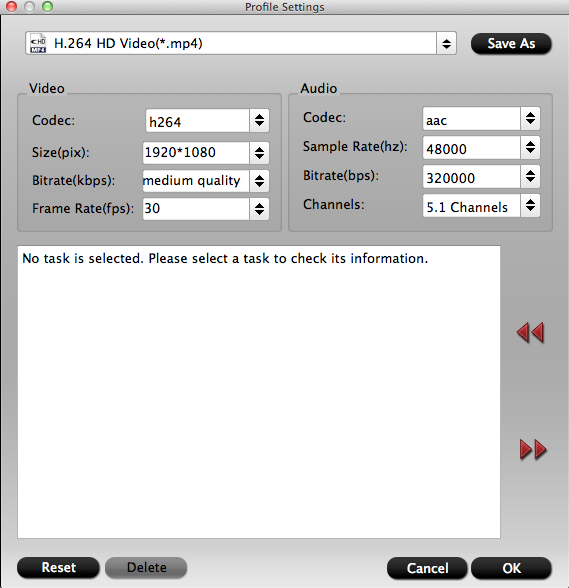
Click “Settings” button to customize these settings. To down-convert ultra HD 4K to 1080p, do remember adjusting video size to 1920*1080 which is 1080p. Meanwhile, other parameters can be adjusted according to your own requirements.

Step 4. Start to convert/compress 4K to 1080p without losing any quality
Once you’re sure all the settings is OK, click the “Start conversion” button to start converting 4K to 1080p on your Mac. When the conversion completes, click “Open” button to locate the 1080p videos. Now yo can do a lot the image and retain detail for a beautiful 1080p finish with highest quality and makes your computer run faster during your edit/grading/playback/uploading process.


